Although it may look difficult to make, Cording really is quite simple
if you follow these steps. Done correctly, cording can add a beautiful
effect to many designs.
See Cording Stitch tips and techniques below.

We hope you have found these tips and techniques helpful.
<center><iframe width="560" height="315" src="//www.youtube.com/embed/uF0mOJU285I" frameborder="0" allowfullscreen></iframe></center>
See Cording Stitch tips and techniques below.
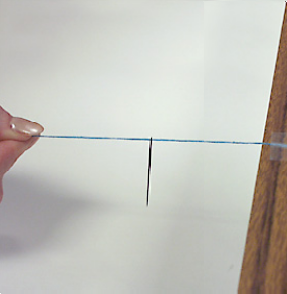
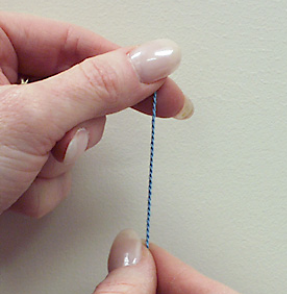
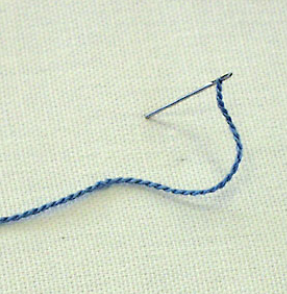
Cording Stitch - Step 1
Tape one end of the strands to the edge of a counter or table. Thread your needle with the number of strands listed in the key, and slide the needle to the middle of the strands.
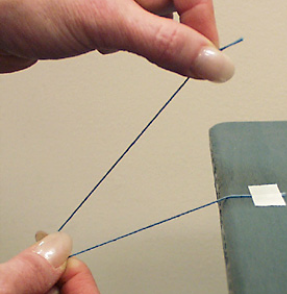
Cording Stitch - Step 2
If the strands are not twisted enough, your Cording will look loose and uneven and will unwind as you stitch with it. Hold the other end of the strands with your hands and begin to twist the strands. You will need to twist the strands about 80 to 100 times.
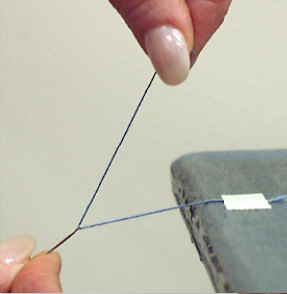
Cross Stitch - Step 3
With one hand grab the needle, then take your other hand (while still holding onto the needle) bring the end of the strands over to the taped end.
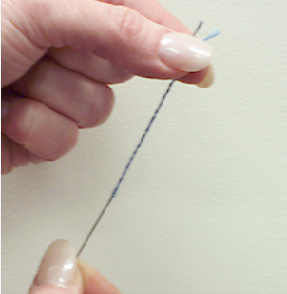
Cording Stitch - Step 4
From underneath the tape (pull taped strands) put the ends that are loose, together.
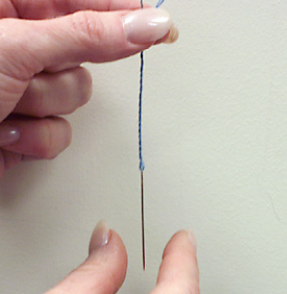
Cording Stitch - Step 5
Allow strands to twist by releasing the needle.
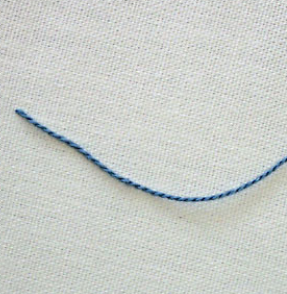
Cording Stitch - Step 6
Run your fingers along length of Cording (while holding loose ends together) to make twists look even and smooth.
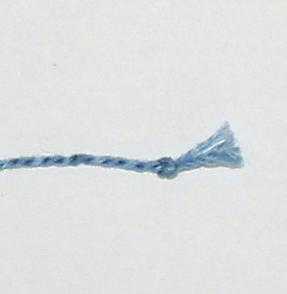
Cording Stitch - Step 7
This is important! To keep them from untwisting, knot loose ends together. The Cording will unravel as you stitch if you don't knot the ends together.
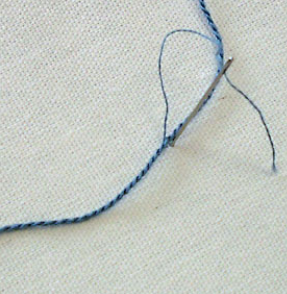
Cording Stitch - Step 8
Come up through (to stitch with the Cording) fabric and lay the Cording in position. Usually there’ll be lines on the chart to show where the Cording should lay.
Cording Stitch - Step 9
Using another needle (with one strand of matching thread) to tack the Cording in place. Space the tacking stitches approximately 1" apart or where the angle of the Cording changes.
Cording Stitch - Step 10
Go down through the fabric (to end the Cording) and knot the Cording close to the back of the fabric; trim excess.
Cording Stitch - Step 11
In a case where you are not going to be stitching with the Cording, (as an example: you are making Cording to use as an ornament hanger), there is no need to thread a needle onto the strands before you start. You will just grab the middle of the strands (instead of grabbing the needle with your hand).
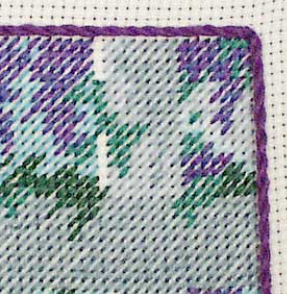
Cording Stitch - Step 12
This is an example that shows Cording on a finished piece.
We hope you have found these tips and techniques helpful.
<center><iframe width="560" height="315" src="//www.youtube.com/embed/uF0mOJU285I" frameborder="0" allowfullscreen></iframe></center>


